













TL;DR:
- Effective online guitar listings combine detailed photography, sound demos, and accurate descriptions to attract serious buyers. Proper equipment, lighting, and workflow are essential for professional presentation, while authenticity verification and multimedia integration build confidence. Consistent practice and attention to detail make showcasing guitars faster and more impactful.
Showing guitars online step by step is the process of creating multimedia-rich listings that accurately represent an instrument’s condition, tone, and provenance to serious buyers. A well-executed online guitar showcase combines professional photography, audio demos, and video walkthroughs into a single, trustworthy presentation. Collectors and musicians shopping remotely rely entirely on what you show them. Get it right, and you attract buyers who are ready to commit. Get it wrong, and even a rare instrument sits unsold. This guide covers every stage of the process, from gear selection to final listing verification, using current best practices for 2026.
What equipment do you need to showcase guitars online effectively?
The right gear separates a professional listing from a snapshot. You do not need a Hollywood budget, but you do need the right tools for each task.
Camera and support:
- A DSLR, mirrorless camera, or a recent smartphone with manual exposure control all work well
- A sturdy tripod eliminates camera shake and keeps framing consistent across shots
- A guitar stand or wall hanger holds the instrument upright for hands-free shooting
Lighting:
- Natural window light is the most flattering and free option for matte and satin finishes
- LED panels or softboxes give you consistent, controllable light when natural light is unavailable
- High-gloss finishes require careful light placement to avoid harsh hotspots
Audio recording:
- A smartphone microphone works for basic demos
- A dedicated condenser or dynamic microphone captures more detail and dynamic range
- A quiet room is non-negotiable. Background noise ruins an otherwise clean recording.
Software and editing tools:
- Adobe Lightroom or Capture One handles RAW photo editing and color correction
- DaVinci Resolve or iMovie works for basic video editing
- eCommercePlayer lets you embed both audio and video directly into a product listing
Pro Tip: Clean the guitar thoroughly before any shoot. Fingerprints, dust, and string grime show up clearly in high-resolution photos and distract buyers from the instrument itself.
How to photograph guitars for online listings
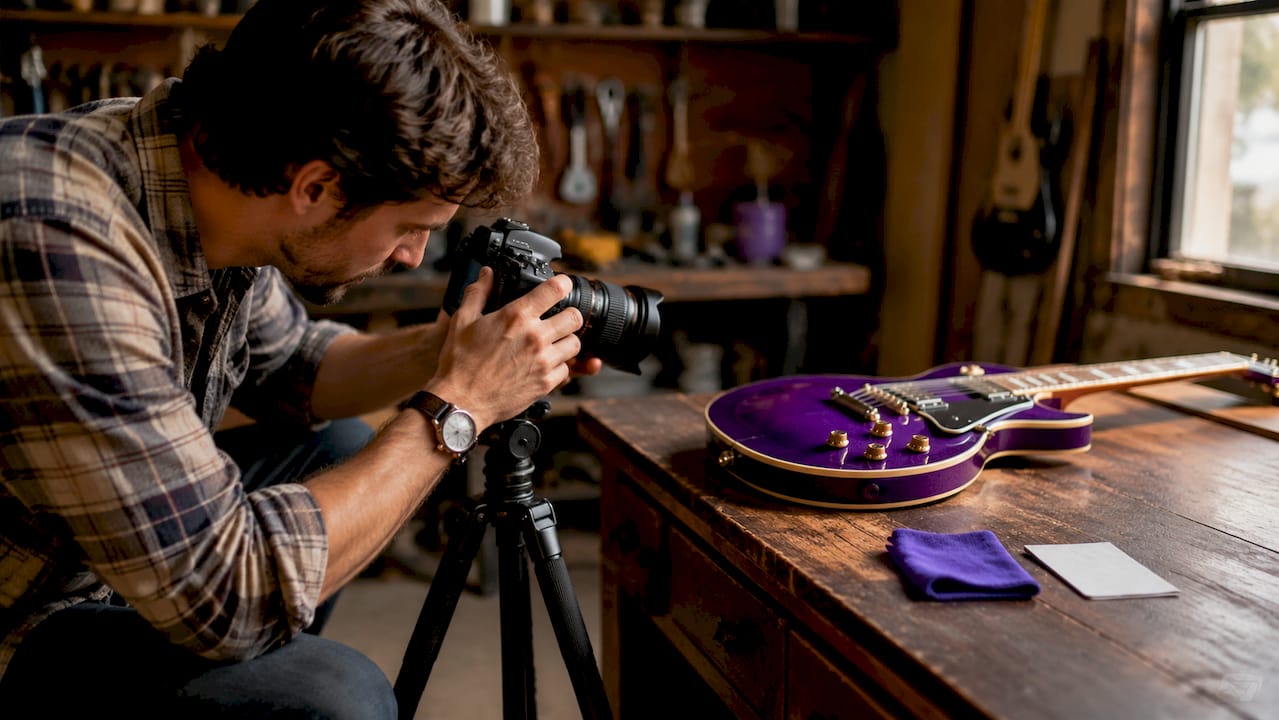
Professional guitar photography follows a defined set of technical standards. Shooting in RAW at ISO 100–400 gives you the most editing flexibility and the cleanest image quality. Use an aperture of f/5.6–f/8 for full-body shots to keep the entire instrument in focus. Switch to f/4–f/5.6 for close-ups where you want slight background separation.
The essential shots every listing needs
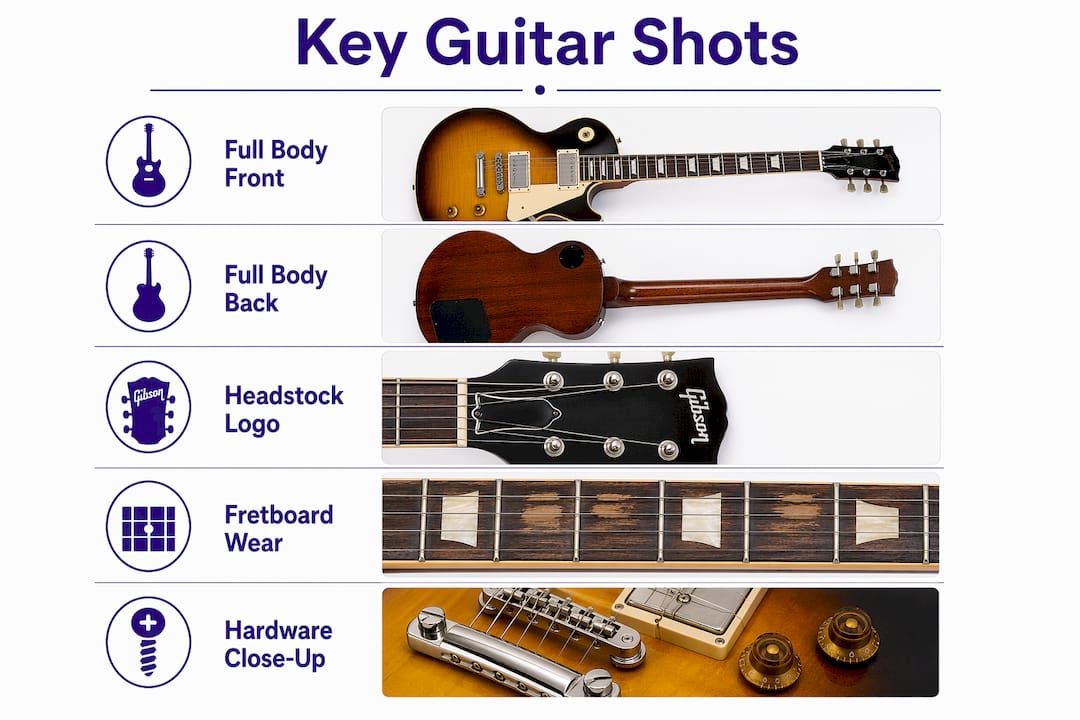
Key shots for a listing include the full body front, full body back, headstock with logo, fretboard showing wear and radius, and the electronics with any plugged-in test results documented. Each of these answers a specific question a buyer has. The headstock shot confirms the brand and model. The fretboard shot shows wear honestly. The electronics shot proves everything works.
Context shots of the guitar on a stand or in a player’s hands help buyers intuitively grasp the instrument’s size and scale. This is especially useful for smaller-bodied guitars like parlor acoustics or three-quarter models, where scale length affects playability.
Step-by-step shooting workflow
- Set up your background. Use a neutral gray, white, or dark backdrop. Avoid busy patterns.
- Position your lighting at a 45-degree angle to the guitar body to minimize reflections.
- Set your camera to RAW, ISO 100, and aperture f/8 for full-body shots.
- Shoot the full front, then the full back without moving the guitar.
- Switch to f/4–f/5.6 and move in for headstock, fretboard, and electronics close-ups.
- Take at least two context shots with the guitar on a stand or in hands.
- Import to Lightroom or Capture One. Correct exposure, remove dust spots, and sharpen strings and frets.
- Export as high-resolution JPEG for listings and a compressed version for fast page loading.
Handling high-gloss finishes
High-gloss finishes reflect everything in the room. Polarizing filters and careful light angle adjustments are the two most reliable solutions. A polarizing filter screws onto your lens and cuts specular reflections without affecting the guitar’s color. Adjusting your light source to a steeper or shallower angle also shifts where reflections fall.
Pro Tip: White balance accuracy is the most commonly overlooked step in guitar photography. Use a custom white balance setting or a gray card to match your light source. A sunburst finish photographed under uncorrected tungsten light looks orange instead of cherry red, which misrepresents the instrument entirely.
| Finish type | Lighting approach | Filter needed |
|---|---|---|
| Matte or satin | Soft window light or diffused LED | None |
| High-gloss lacquer | Angled LED with diffusion | Polarizing filter recommended |
| Natural wood grain | Raking side light to show texture | None |
How to record and integrate audio and video demos
Audio and video demos convert browsers into buyers faster than photos alone. Combined audio and video listings increase buyer engagement and reduce returns by letting buyers hear the exact sound before purchasing. The investment in time is modest. A complete recording workflow takes about 15 minutes once you have practiced it.
Recording acoustic guitars
Acoustic guitar audio demos are often more influential than photos for buyers evaluating tone. Record in a completely silent room with your microphone positioned 2–3 feet from the soundhole. That distance captures the full resonance and sustain without excessive room sound. Close-miking at under a foot produces a thin, boxy tone that does not represent the guitar accurately.
Pro Tip: Turn off air conditioning, fans, and any appliances before recording. Even a refrigerator hum in the background undermines the perceived quality of the instrument. Check your acoustic guitar testing approach before you hit record.
Recording electric guitars
Electric guitar demos must include both clean and overdriven tones to show tonal versatility across gain stages. Play through each pickup position separately. Demonstrate the volume and tone knobs working through their full range. Buyers want to know the electronics are functional, not just that the guitar looks good.
Step-by-step audio and video workflow
- Set up your recording space. Silence the room completely.
- For acoustic: position the mic 2–3 feet from the soundhole. For electric: connect to your amp and set a clean tone first.
- Record a 30-second audio demo. Play open chords, single notes, and a brief melody.
- For electric: record a second 30-second clip with overdrive engaged.
- Set up your camera on a tripod for the video walkthrough.
- Record a 45-second video showing the full body, close-ups of wear, the neck joint, and the electronics functioning.
- Edit audio in GarageBand or Audacity. Trim silence, normalize levels, and export as MP3.
- Embed both audio and video into your listing using eCommercePlayer or your platform’s media tools.
Key details buyers expect in a video walkthrough:
- Full instrument from headstock to strap button
- Close-up of any wear, dings, or repairs
- Neck joint inspection (especially on bolt-on necks)
- Electronics demo with pickup selector and knobs in use
How to write listings and verify showcase quality
A listing description must complement your multimedia, not repeat it. Lead with the instrument’s make, model, year, and overall condition. Follow with specific condition notes that reference what buyers can see in the photos and hear in the audio demo. Buyers trust descriptions that match the visual evidence.
Serial numbers and internal label photos are the primary authenticity checks for collectors. Include a clear photo of the serial number and any internal labels. Reference these in your description with the exact serial number written out. This step alone separates a professional listing from an amateur one. A thorough guitar valuation workflow supports this process by documenting condition and provenance systematically.
Pre-publish verification checklist:
- White balance is accurate and finish color matches the real instrument
- No blown-out highlights on the body or headstock
- Audio is free of background noise and hum
- Video walkthrough covers all required angles
- Serial number photo is sharp and readable
- Description references specific wear shown in photos
- File names use descriptive text (e.g., “1962-gibson-es335-front.jpg”) for SEO
Pro Tip: Use descriptive file names and alt text for every image. Search engines index image metadata, and well-named files improve your listing’s visibility in image search results.
Common challenges when showcasing guitars online
Every seller runs into the same set of problems. Knowing the fix before you hit the issue saves time and frustration.
Reflections on gloss finishes: Move your light source to a steeper angle or use a polarizing filter. Never try to fix reflections in post-processing alone. The fix must happen during the shoot.
Background noise in audio recordings: Record late at night or early in the morning when ambient noise is lowest. A heavy blanket hung behind the guitar absorbs room reflections and reduces noise pickup.
Blown-out highlights: Reduce your light intensity or move the light source farther from the guitar. Shoot in RAW so you can recover highlight detail in post-processing.
Slow video pacing: Keep the walkthrough under 60 seconds. Buyers lose attention quickly. Move the camera steadily and cut any dead air in editing.
Large file sizes: Export photos at 2,000 pixels on the long edge for listings. Use HandBrake to compress video files without visible quality loss. Fast-loading pages keep buyers engaged.
No natural light available: Two LED panels set at 45-degree angles on either side of the guitar replicate the effect of window light. Diffuse them with a white sheet or a softbox attachment to avoid harsh shadows.
Pro Tip: Shoot a test frame before committing to a full session. Check the histogram in your camera or editing software. A good exposure shows data spread across the full range without clipping at either end.
Key takeaways
Showing guitars online step by step requires professional photography, clean audio demos, and accurate written descriptions working together to build buyer confidence and reduce returns.
| Point | Details |
|---|---|
| Shoot in RAW at low ISO | Use ISO 100–400 and f/5.6–f/8 for full-body shots to capture accurate detail. |
| Control white balance precisely | Use a gray card or custom setting to prevent finish color distortion in photos. |
| Record audio in a silent room | Position the mic 2–3 feet from the soundhole for acoustic guitars to capture full resonance. |
| Include serial number photos | Collectors require clear serial number and label images to verify authenticity and provenance. |
| Embed audio and video together | Combined media listings increase engagement and lower return rates compared to photos alone. |
What I’ve learned from years of showcasing vintage instruments
The biggest mistake I see from sellers new to online guitar showcasing is treating the listing as a formality. They take three photos with a phone, write two sentences, and wonder why serious buyers pass. A vintage or collectible guitar deserves a presentation that matches its quality.
The second mistake is overcorrecting in post-processing. I have seen listings where the finish color was so heavily edited that the guitar looked nothing like the real instrument. Buyers who receive a guitar that does not match the photos return it immediately. Authenticity in your presentation builds the kind of trust that generates repeat buyers and referrals.
The detail that consistently surprises sellers is how much audio matters. For acoustic instruments especially, a clean 30-second demo recorded in a quiet room does more selling work than ten photos. Buyers can hear sustain, resonance, and tonal character in a way no image can convey. Pairing that audio with a thorough video walkthrough and honest condition notes creates a listing that answers every question before it gets asked.
The workflow becomes fast once you practice it. The first time takes an hour. By the fifth guitar, you are done in 20 minutes. Build it into your routine from the start, and it stops feeling like extra work.
— Vintage
Vintage-guitar-world: where serious collectors find rare instruments
Vintage-guitar-world specializes in curated, authenticated vintage and handcrafted guitars, from classical and flamenco to acoustic and electric. Every listing on the platform reflects the same standards described in this guide: detailed photography, condition documentation, and provenance verification.

Whether you are building your collection or looking for a specific instrument, Vintage-guitar-world offers types of vintage guitars with full historical context and expert evaluation. The platform also provides collectible guitar identification guides to help you understand exactly what you are buying. Collectors who want to go deeper can explore the full range of unique vintage guitars available in the shop, each presented with the detail and care that rare instruments deserve.
FAQ
What is the best camera for photographing guitars online?
A DSLR or mirrorless camera shooting in RAW gives the best results, but a recent smartphone with manual exposure control also produces professional-quality images when paired with good lighting.
How long should a guitar audio demo be?
A 30-second audio demo is the recommended length for online listings. It is long enough to demonstrate tone and sustain without losing a buyer’s attention.
Why does white balance matter in guitar photography?
Incorrect white balance shifts the finish color in photos, making a cherry sunburst look orange or a natural blonde look yellow. A gray card or custom white balance setting prevents this and keeps the listing accurate.
Do I need separate audio and video files for a guitar listing?
Yes. A 30-second audio demo and a 45-second video walkthrough serve different purposes. Audio conveys tone; video shows condition, wear, and functionality. Tools like eCommercePlayer let you embed both in a single listing player.
What details do collectors look for in a vintage guitar listing?
Collectors prioritize serial number and label photos for provenance verification, clear images of all wear and repairs, and accurate condition descriptions that match the visual evidence in photos and video.