














TL;DR:
- Systematic inspection of construction, hardware, and sound verifies genuine handcrafted guitars.
- Playability and resonance tests are crucial final steps for confirming authenticity and condition.
- Authenticity relies on original parts, precise craftsmanship, and signs of genuine aging rather than cosmetic perfection.
Telling a genuinely handcrafted guitar from a factory shortcut is harder than most people expect. Serial numbers can be faked, finishes can be refinished, and parts can be swapped so convincingly that even experienced players get burned. Whether you’re hunting for a pre-war Martin, a 1960s Gretsch, or a modern luthier-built classical, your best protection is a repeatable, systematic checklist that goes beyond looking and actually tests. This guide walks you through every stage of that process, from construction analysis to the final play test, so you walk away confident in what you’re buying or selling.
Table of Contents
- Construction and build quality
- Neck and fret checks
- Hardware and electronics inspection
- Sound, resonance, and playability tests
- Why originality matters more than perfection
- Next steps: Learn more and find trusted guitars
- Frequently asked questions
Key Takeaways
| Point | Details |
|---|---|
| Structural quality matters | Neck joint precision and wood choices are foundational for sound and durability. |
| Neck and fret setup are critical | Proper relief and action ensure playability and authenticity in vintage or handcrafted guitars. |
| Original hardware boosts authenticity | Genuine tuners, bridges, and verified electronics increase collectible value. |
| Play test reveals true craftsmanship | Hands-on sound and comfort checks confirm originality and build quality. |
| Originality outweighs cosmetic perfection | Collectors favor history and originality over flawless appearance. |
Construction and build quality
The first thing a knowledgeable collector does is study how a guitar was put together. Construction quality reveals whether a builder prioritized speed or precision, and the evidence is right there in the wood and glue joints if you know where to look.
Neck joint types are one of the fastest indicators of origin. A proper dovetail neck joint, used on most quality acoustic guitars, should fit tightly with virtually no visible gap. According to build quality standards, neck joint tolerances under 0.1mm are the mark of handcrafted work, while factory production joints often show measurable slop that affects resonance transfer and long-term stability. A bolt-on neck is not automatically inferior, especially on electric guitars, but the fit between the heel and the body pocket still needs to be tight.
Bracing patterns inside the body are equally important. X-bracing, scalloped X-bracing, fan bracing on classical instruments, and ladder bracing each create different acoustic responses. A well-scalloped brace is thinner toward its ends and stiffer at its center, encouraging the top to vibrate more freely. You can often see this through the soundhole using a small mirror and a penlight. Uneven or roughly shaped braces suggest machine routing rather than hand shaping.
Binding and finish tell their own story. Clean binding channels, consistent wood grain across the top and back, and a finish that flows evenly around the curves and edges without bubbling or orange-peel texture all point toward careful, deliberate work. You can follow our vintage guitar buying steps for a fuller guide to each of these elements in context.
Here’s a quick inspection sequence to run through:
- Examine the neck joint under bright light for any gaps or filler material
- Peer through the soundhole with a mirror to check brace shaping and glue coverage
- Run your fingernail along the binding seam to feel for lifting or unevenness
- Inspect wood grain on the top for consistent, tight grain lines (especially on spruce)
- Check the finish for crazing, checking, or overspray that might indicate a refinish
- Look at fret ends under a raking light to spot uneven leveling or sharp edges
Pro Tip: Use a digital caliper to measure the gap at the neck joint. A gap over 0.15mm in a claimed handcrafted instrument is a red flag worth investigating further, especially before high-value purchases.
| Feature | Factory built | Handcrafted |
|---|---|---|
| Neck joint tolerance | 0.2mm or more | Under 0.1mm |
| Brace shaping | Machine routed, uniform | Hand shaped, tapered |
| Binding installation | Machine cut channels | Hand fitted, tight seams |
| Finish application | Sprayed, consistent thickness | Variable, often thinner |
| Wood selection | Matched by machine | Hand selected for grain |
| Fret leveling | Batch process | Individual hand leveling |
If you’re considering selecting handcrafted guitars for your collection, this table gives you a reliable baseline for comparison. And if you ever need to ship a high-value instrument for inspection or purchase, review guitar shipping best practices before packaging.
With an understanding of construction basics, you can move to evaluating neck setup, which is crucial for playability and longevity.
Neck and fret checks
The neck is where craftsmanship and playability intersect most directly. A beautiful body means nothing if the neck is twisted, the action is unplayable, or the frets are uneven. This inspection stage is also one of the most revealing for authenticity, because shortcuts here are hard to disguise.
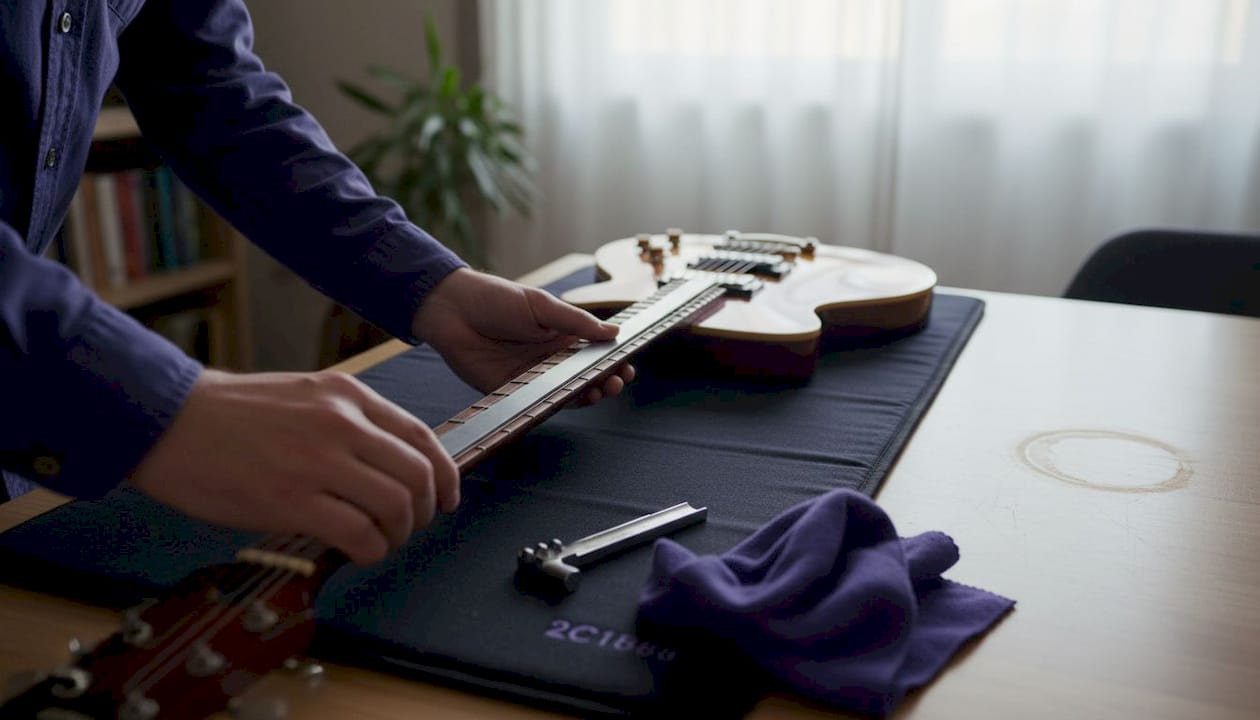
Sight down the neck from the headstock end with the guitar at eye level. The fretboard should show a gentle, consistent curve, not a twist, hump, or S-shape. A slight forward relief (a small concavity in the middle of the neck) is normal and healthy. A completely straight neck, while visually appealing, can cause buzzing. A back-bowed neck is problematic and requires truss rod correction or professional attention.
Relief and action numbers matter precisely. Standard relief runs 0.15 to 0.20mm, measured at the 7th fret while fretting the 1st and last fret simultaneously. Action at the 12th fret should fall between 2.0 and 2.5mm on the bass side for most vintage acoustic and electric guitars. Classical guitars run higher, typically 3.5 to 4.5mm on the bass side, to accommodate wider string movement and fingerpicking technique.
Here is a numbered step-by-step neck and fret inspection sequence:
- Hold the guitar at arm’s length and sight down the treble and bass sides of the neck separately
- Fret the first and last fret simultaneously and check the gap at the 7th fret with a feeler gauge
- Use a short straightedge (6 inch) to check for high or low frets along the length of each string path
- Run your fingertip slowly along both fret ends to detect any sharpness or unevenness
- Check the nut slot depth by fretting the 3rd fret and observing string clearance at the 1st fret
- Test the truss rod with a quarter-turn adjustment and listen for any cracking, grinding, or resistance
- Verify fret levelness by pressing adjacent frets together and checking for any rocking
Our vintage guitar review guide covers these measurements in the context of specific guitar eras, which matters because what’s acceptable in a 1950s archtop differs from what you’d expect in a modern classical.
Pro Tip: To test truss rod functionality without committing to a full adjustment, loosen the strings, make a quarter-turn, retune, and check the relief change. A responsive truss rod moves predictably. No movement, or sudden grinding, signals a potential break or stripped rod, which is a significant repair cost.
Fret smoothness and levelness are not just about comfort. Uneven frets cause notes to die or buzz in specific positions, and they reveal whether a guitar received careful finishing after fret installation. Hand-leveled frets show consistent, slightly crowned profiles across all 20 or 22 positions. Machine-leveled frets from budget factories sometimes show flat crowns or rough edges. For anyone using our guiding vintage authentication resources, fret condition is also one of the clues for estimating original vs. refretted necks.
Once you’ve confirmed neck and fret integrity, make sure the hardware and electronics match the expected craftsmanship and originality.
Hardware and electronics inspection
For vintage guitars, hardware is where authentication gets really interesting. Replacement tuners, bridges, and electronics are common, sometimes for legitimate functional reasons, and sometimes to disguise a less desirable instrument as something more valuable.
Tuning machines should turn smoothly with consistent resistance throughout their full rotation. Slipping, grinding, or excessive play in the gear indicates wear or low-quality manufacture. On vintage instruments, look for matching screw hole patterns. Extra or filled holes almost always mean replacement tuners. The finish wear on original tuner buttons should match the overall aging of the instrument.
Bridge and nut material carry real acoustic and authentication weight. Bone is the preferred material on quality vintage and handcrafted guitars, producing better resonance transfer and tonal clarity than plastic substitutes. A bone nut has a slightly translucent, off-white appearance and feels dense and cool to the touch. Plastic nuts often look brighter white and may show tool marks or mold lines. As hardware quality standards confirm, a bone nut and saddle are among the clearest markers of a quality build.
Signs of replaced versus original hardware:
- Mismatched screw slots or missing screws in tuner plates
- Oxidation patterns that don’t match across all hardware pieces
- Modern Phillips head screws on a pre-1970s instrument (most originals used slotted screws)
- Glue residue or discoloration around the bridge, suggesting a re-glue or replacement
- Pickup routs that appear wider than factory spec, suggesting pickup swaps
- Solder joints that look bright and shiny on an otherwise aged instrument
Potentiometer date codes are gold for electric guitar authentication. Most American-made pots carry a six or seven digit EIA source code stamped onto the casing. The first three digits identify the manufacturer, and the last three indicate the year and week of production. A pot stamped 137-6435 was made by CTS in the 35th week of 1964. If a guitar is claimed to be a 1963 model but its pots are coded to 1968, something doesn’t add up.
| Hardware component | Authenticity marker | Red flag |
|---|---|---|
| Tuning machines | Matching holes, period-correct finish wear | Extra screw holes, mismatched aging |
| Bridge | Original wood type, correct saddle material | Glue residue, modern material substitutes |
| Nut | Bone or period-correct material | Bright white plastic, tool marks |
| Potentiometers | EIA date codes match claimed year | No codes, codes post-date the guitar |
| Output jack | Correct thread type for era | Modern Switchcraft on a pre-1960 body |
| Pickups | DC resistance matches spec, original covers | Overly bright solder, wrong bobbins |
“Originality in hardware is not just about value — it’s about sound. An original PAF humbucker and a modern reproduction may measure similarly but behave very differently under a player’s hands.” — Expert consensus in vintage guitar authentication
You can explore our vintage guitar authentication service if hardware inspection reveals questions you can’t answer independently. Our team can cross-reference date codes, hardware specs, and production records from specific manufacturers.
Sound, resonance, and playability tests
Every checklist ultimately leads here. A guitar can pass every visual and measurement test and still sound hollow, unbalanced, or lifeless. The sound test is not subjective luxury — it is essential verification. The resonance and playability evaluation should be your final checkpoint before any significant purchase decision.
Follow this numbered sequence for a complete sound and playability assessment:
- Tap the center of the top with your knuckle and listen for a clear, bell-like resonance rather than a dull thud
- Play an open low E string and count how long the note sustains before fading completely
- Play a chord in the first position, then in the 7th position, and compare tonal balance across registers
- Check each string individually for buzzing, dead notes, or inconsistent volume
- Play a simple melody on the treble strings and assess note clarity and separation
- Test the bass strings for boom or muddiness that might indicate loose bracing
- Assess physical comfort: neck width, profile shape, body depth, and overall ergonomics for your playing style
Tapping resonance is particularly revealing. Quality spruce tops vibrate freely and produce a clear, lively ping when tapped. Dense mahogany will sound slightly darker and more controlled. A dull, flat tap response often points to thick finish, over-bracing, or top damage. Tight-grained Engelmann spruce, with grain lines running 15 or more per centimeter, generally produces more complex overtones than wider-grained alternatives.
Pro Tip: For any guitar valued over $2,000, a play test appointment is not optional. It is due diligence. Our identifying rare guitars guide explains how certain models respond tonally in ways that confirm or challenge authenticity claims. Sound characteristics for specific makers are well documented.
“A great vintage guitar reveals itself in the first minute of playing. Originality without playability is just a museum piece. What we want is both — a guitar that has lived and still sings.” — Authentication expert perspective
The guiding vintage authentication process at Vintage Guitar World always includes a full play test, precisely because sound characteristics are part of the authentication record.
Why originality matters more than perfection
Here’s the perspective that many new collectors miss entirely: cosmetic perfection in a vintage guitar is often a warning sign, not a selling point.
Think about it. A 1959 Les Paul Standard that looks factory fresh in 2026 has almost certainly been refinished, possibly had parts replaced, and may have undergone extensive restoration that reduces rather than preserves its original character. Gibson certified vintage programs prioritize originality over appearance precisely because the market and expert community recognize that provenance and original parts carry more value than cosmetic condition.
Honest wear tells a story. Buckle rash on the back, fret wear under the first three positions, finish checking from temperature cycles, slight neck reset evidence — these are not flaws. They are proof of life. They confirm that a guitar was played by real musicians, that it survived real decades, and that its components are genuine to its period. A guitar that looks too good for its age deserves more scrutiny, not less.
The play test is your final authority. Visual checks and measurements confirm what a guitar is. The play test confirms what a guitar does. These are not the same thing. We’ve seen meticulous documentation on instruments that felt dead under the hands, and we’ve seen rough-looking guitars with worn frets that sang with extraordinary voice. Prioritize what you hear and feel after completing your checklist, not before it.
Pro Tip: Don’t pass over a well-played instrument with documented history just because it shows wear. Cross-reference its condition with our authenticating collectible guitars guide, and check our vintage collecting tips for how to weight condition versus originality in your buying decision.
Next steps: Learn more and find trusted guitars
Putting a checklist into practice requires more than reading — it takes access to verified instruments and expert resources that you can trust.

At Vintage Guitar World, we’ve built our entire platform around exactly this kind of informed buying experience. Our guitar appraisal guide walks you through professional valuation methods used by certified appraisers, giving you the language and criteria to evaluate any asking price with confidence. For collectors building a focused collection, our resource on collectible guitars features outlines what separates truly collectible instruments from simply old ones. Every guitar in our curated selection has been evaluated against the same criteria covered in this article, and we offer testing appointments, certification, and full provenance documentation for high-value instruments.
Frequently asked questions
What is the most important feature of guitar craftsmanship?
Original construction and hardware are the core markers. Neck joint type, bracing, and binding quality directly affect both market value and the guitar’s acoustic performance.
How can I tell if my vintage guitar is authentic?
Verify original parts, read pot date codes against the claimed production year, and confirm neck joint precision. For high-value instruments, professional authentication is the most reliable path to a definitive answer.
What action or relief settings are best for vintage guitars?
Standard relief is 0.15 to 0.20mm and action at the 12th fret typically runs 2.0 to 2.5mm for vintage electrics and acoustics. Classical guitars run noticeably higher, around 3.5 to 4.5mm on the bass side.
Why is the play test important in assessing guitar quality?
It confirms resonance, sustain, and playability that visual checks cannot reveal, and according to certified vintage programs, a hands-on test is considered essential before authenticating any high-value instrument.