


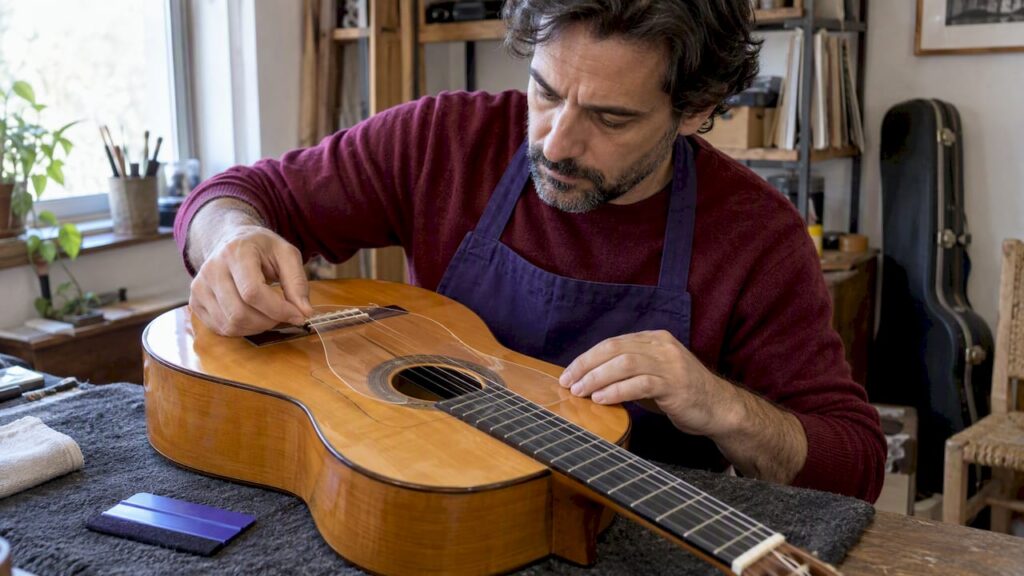

Yes, you can retrofit a golpeador, and for most players the safest first choice is a thin, transparent electrostatic or self-adhesive mylar plate in the .010 to .014 inch range. If your guitar has a delicate finish, such as French polish or old nitrocellulose lacquer, or it holds real vintage value, get a luthier’s opinion before you touch it.
TL;DR:
- Electrostatic plates are the easiest to reposition and leave no residue, making them ideal for stage guitars and resale value preservation.
- Self-adhesive golpeador plates apply quickly but risk residue on removal, requiring careful peeling and possibly heat for proper installation.
- Glued plates offer maximum durability but demand patience and proper technique for removal, and curing should be allowed several days before playing.
- Avoid DIY on antique or highly valuable guitars; professional restoration is safer to protect resale value and ensure proper installation.
Table of Contents
- Which golpeador to choose: electrostatic, self-adhesive or glued
- Preparation and tools checklist before you start
- Step-by-step installation for each plate type
- How to remove an old golpeador safely
- Diagnosing installation issues and sound changes
- When DIY makes sense and when to call in help
- How Vintage Guitar World can help with restoration and valuation
- Sources
- FAQ
Which golpeador to choose: electrostatic, self-adhesive or glued
The three common methods each solve a different problem. Electrostatic plates cling through static charge alone, leaving no adhesive residue and staying nearly invisible on the top, which makes them the preferred pick for stage guitars where appearance matters. Self-adhesive plates go on faster and stay put through aggressive playing, but the backing can leave gum behind when it eventually comes off. Glued plates, usually applied with white PVA, are the most permanent option and the least forgiving to remove.
Material matters as much as method. Mylar (PET) is thin, flexible, and the standard choice for players who want to preserve natural golpe response, while polycarbonate resists scratching better but can be harder to source locally.
- Electrostatic: no residue, easiest to reposition, best for finished guitars you may resell.
- Self-adhesive: quick to apply, strong hold, residue risk on removal.
- Glued (PVA): most durable bond, reversible only with patience and the right technique.
Thickness in the .010 to .014 inch (10 to 14 mil) range balances protection with sound, since thicker laminates tend to blunt the attack of the golpe technique. Some players cut a single continuous plate that wraps below the rosette, while others prefer a two-piece layout with a gap at the soundhole for a lighter visual footprint. Skip vinyl sheeting sold as an emergency fix: it scratches quickly and rarely lies flat enough for a clean edge.
Preparation and tools checklist before you start
Rushing the setup causes more damage than the actual plate application. Loosen or fully remove the strings and pad the bridge area so nothing scratches the top while you work. Set up on a dust-free, well-lit bench, and keep a microfiber cloth and a chamois within reach for constant wiping.
- Build or reuse a template sized precisely to the rosette and mask the surrounding top with low-tack tape.
- Gather a soft squeegee or plastic card, a sharp scalpel, a metal ruler, and naphtha for cleanup.
- Keep a small heat source, like a hair dryer on low, on hand for softening old adhesive if you are replacing an existing plate.
- Test-fit the template dry before you cut the actual plate material, oversizing slightly rather than cutting short.
Pro Tip: Cut the template about 1mm oversized on every edge; it is far easier to trim a plate down than to explain a gap around the rosette.
If the guitar has a French-polished top, an antique finish, or any history that suggests real collector value, consider booking a professional testing appointment before attempting any of this yourself.
Step-by-step installation for each plate type
Best for stage guitars wanting invisibility: electrostatic. After the standard prep, clean the top with a lint-free cloth, dampen the plate very lightly with water to activate the static charge, and float it into position over the template marks. Squeegee from the center outward to chase bubbles to the edges, then trim any overhang with the scalpel held at a shallow angle.
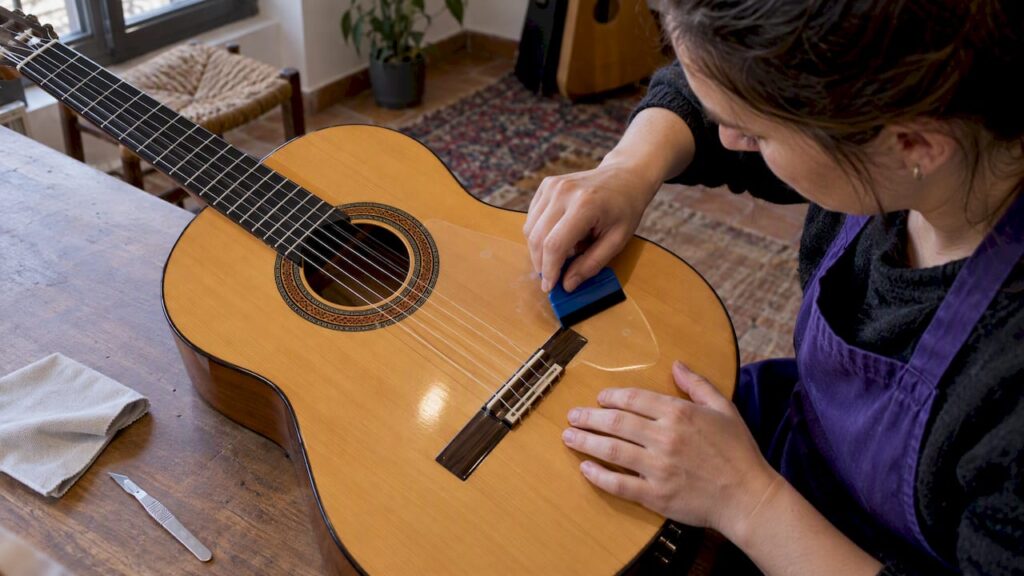
Best for players who want a strong hold without permanent glue: self-adhesive. Peel back a small section of the backing and float the exposed edge into place using a drop of soapy water to allow repositioning. Once aligned, peel the backing away in short sections, pressing forward with the squeegee as you go rather than pulling the whole liner at once. If the adhesive feels gummy or resists smooth pressing, a controlled heat source such as a hair dryer on low softens it enough to lay flat. Trim the edges last, after the plate has fully bonded.
Best for players who want maximum durability and can accept a demanding removal later: glued (PVA). Thin the glue slightly so it spreads in an even, thin film rather than pooling. Spread it with the squeegee, lay the plate down, and apply light, even weight (books work fine) rather than heavy clamping, which can starve the joint of glue at the edges. Let it cure undisturbed for several days before playing hard on it, since a rushed cure is the most common cause of edge lifting.
Across all three methods, the finishing checks are the same:
- Hold the top to raking light to spot any remaining trapped air under the plate.
- Run a light golpe test to confirm the edge does not lift under normal striking pressure.
- Give adhesive-based installs at least a day of rest before subjecting them to a full practice session.
Anyone setting up a new instrument after this kind of work often benefits from a broader flamenco guitar checklist to confirm nothing else needs attention.
How to remove an old golpeador safely
Removal is where most finish damage actually happens, more often than during installation itself. For gummy self-adhesive backings, work slowly: apply gentle, controlled heat and peel at a low angle rather than pulling straight up. For plates you plan to replace with another self-adhesive piece, a soapy water float loosens the bond without forcing it.
- Use naphtha, sometimes sold as lighter fluid, or a specialized film cleaner such as Diamant to dissolve leftover adhesive residue.
- Nitrocellulose and French polish finishes react badly to some solvents, so test any cleaner on a hidden spot first.
- Once residue is gone, let the top dry fully, wipe away any oily film, and do a final dust pass before laying down a new plate.
Pro Tip: If a plate has been on for years and the backing feels fused to the lacquer rather than just sticky, stop and let a luthier assess it before you force anything.
Diagnosing installation issues and sound changes
Bubbles under a freshly applied plate usually mean the squeegee pass was too fast; reheat gently (adhesive types only) and re-press from the center out. Edge lifting after a few days often points to insufficient pressure during cure rather than a bad adhesive.
Thickness drives most of the tonal effect: thinner plates in the recommended 10 to 14 mil range tend to preserve the natural golpe attack, while heavier laminates dampen it. Before assuming your guitar sounds different because of the plate, rule out installation problems first, loose edges, trapped dust, or an uneven bond can all mimic a change in responsiveness that has nothing to do with the material itself. A simple before-and-after comparison, recording a short sequence of identical golpe strikes, gives a clearer answer than memory alone.
- Bubble or trapped dust: reheat lightly and re-squeegee toward the nearest edge.
- Lifting corner: clean under the flap and reapply light, even pressure for a full cure cycle.
- Duller attack than expected: check plate thickness against the .010 to .014 inch range before blaming the guitar.
When DIY makes sense and when to call in help
Modern guitars with tough polyurethane or catalyzed finishes tolerate a careful DIY retrofit well, and an electrostatic or self-adhesive plate is a reasonable weekend project on that kind of instrument. Antique instruments, French-polished tops, or any guitar you suspect has resale or collector value deserve a different approach: a botched removal or a solvent reaction can permanently reduce what a serious buyer will pay. Professional restoration and a documented valuation protect that value in ways a home repair cannot. If you are ever unsure which category your guitar falls into, that uncertainty is itself the signal to ask before you start cutting plastic.
— Vintage
How Vintage Guitar World can help with restoration and valuation
If your flamenco guitar carries real age, a delicate French-polished top, or simply more value than you want to risk on a first attempt, professional support closes that gap without the guesswork of a home repair. Specialized services include restoration work, playing appointments to test an instrument before any modification, and formal certificates and valuations that document a guitar’s condition before and after service.

- Restoration is the right call for antique finishes, structural repairs, or any golpeador removal that looks risky.
- A testing appointment lets you assess a guitar’s condition and sound in person before committing to any change.
- A certificate or valuation is worth having before and after work on any guitar with real resale or collector value.
Get in touch through Vintage Guitar World to book a consultation or ask about restoration for your instrument.
Sources
Sources on golpeador types, thickness, and safe removal are linked throughout the sections above.
- Tomatito
- Golpeador overview and practical guidance — ForoFlamenco (printable thread)
- Klebstoffrückstände (Golpeador) von der Decke entfernen — Forum Klassikgitarre
- Flamenco guitar vs classical guitar — Siudy Flamenco
FAQ
What is the difference between a classical guitar and a flamenco guitar?
Both fall under the broader umbrella term “Spanish guitar,” but they are built for different jobs. Flamenco guitars are typically lighter, with lower action and a brighter, more percussive voice suited to golpe technique, while classical guitars prioritize sustain and a fuller tone for fingerstyle repertoire.
What is the Spanish guitar called?
The general term is simply “Spanish guitar,” which covers both the classical and flamenco families of nylon-string instruments. The word golpeador itself comes from the Spanish verb golpear, meaning “to hit,” describing the plate’s job of protecting the top from finger strikes.
What thickness golpeador should I buy?
Most players and luthiers point to a range of .010 to .014 inches (10 to 14 mil) as the sweet spot between real protection and keeping the golpe attack clear. Going noticeably thicker than that trades sound quality for durability you likely do not need.
Can I remove a golpeador without damaging the finish?
It is possible with patience: soften adhesive with controlled heat, peel slowly at a low angle, and use a solvent like naphtha or a film cleaner such as Diamant for stubborn residue. French polish and older nitro finishes are more sensitive to solvents, so test on a hidden area first or bring the guitar to a professional if you are unsure.
Will a golpeador change how my guitar sounds?
A thin plate in the recommended thickness range generally preserves the natural golpe attack, while thicker or heavier materials can noticeably dampen it. Many perceived sound changes actually trace back to installation issues like trapped air or an uneven bond rather than the plate material itself.